Monday, May 30, 2011

Me and Bill C.

A couple of weeks ago, I attended the Bill Clinton presentation when he was in town.  His talk was very interesting.  One part of his talk that I found informative was the work that he is doing with Haiti.  He heads up a non-government organization that are developing strategies to help the devastation.   Part of that is trying to develop and implement systems like a mortgage system where a citizen can borrow to build a house.  One of the points he made was that when he was President, decisions on this type of thing were made with consideration to the media backlash.  He said that now that he's not the current President, the media doesn't really care about what he does, so decisions are made differently.   Sometimes their efforts work and sometimes they don't.  He was very hopeful for Haiti's new government.

Anyway, I did get my picture taken with Bill.  This is a photo of my photo.  No more than a few seconds of pleasantries were exchanged while we were shaking hands.  I never had time to ask him if he could arrange for me to meet Oprah.    I'll have to find another strategy to meet her.

Sunday, May 29, 2011

It's going to be a Blue Winter Wonderland this July

Decision made... Earlier this week, I was waffling about which color to do my Winter Wonderland - Christmas in July project.   Red, Blue or Green.

I've decided I'm going with blue.  I invested a whole $3.00 on the floss, so there's no going back now..(wink wink).    I think winter blue will have a longer display life than red and I can continue to display or use it after Christmas and well into the winter.   And the blue just seems more appealing to me right now.... 

A first look into my stash reveals that I have a beautiful white tone on tone fabric with the lightest snowflakes on it.   (can you see them in the photo)  I can use that white for all the border blocks.  I'll use plain white for the hand embroidered blocks.   I'm pulling blues, but the don't seem to be the right blues.... I may have to go fabric shopping.

Friday, May 27, 2011

Acorn Needle Wallet

Acorn wallet, 4 x 6 closed
I'm in between projects.  I'm not sure what to start next.  I finished my daughter's curtains that I had been working on all week.  I've cut a few kits and I doing of planning of things I want to make.   But not actually sewing anything right now.. Yesterday I felt the need to sew something small. 

So early in the morning, I dug out my Art to Heart Sew Necessary book and decided to "Whip" a needle book.   This time I would make the"Acorn" needle book.  

Outside cover, and lining of Acorn needle wallet
 After about considerable time pawing through my scraps, I realized that this pattern was lots more finicky than the Posy wallet from the same book.   Not a problem, I'll finish it since I have so much time into it and it's nice to have a challenge once in a while, right?  

Back of applique and layering the back and the front.
Since I had spent so much time looking for the 10 different bits and pieces of fabric, I thought I better cut enough for two needle wallets. 

This pattern is so cute, with the leaves applique and the special curvy shape at one end.  But those things give many more opportunities to make mistakes.  And I did make a few mistakes.   With diligent concentration, and a drive to get it done without any more mistakes,  I did finish one, and the other is almost done. 

Acorn Needle Wallet

I do like it and I will fill it with sewing things to leave by the couch. I will enjoy using it to sew buttons etc.   

But, when I need to do more needle wallets, I'll probably stick to the Posy wallets like I made a couple of weeks ago. 

Have you ever gotten into a little project that was just a little over your head?


Wednesday, May 25, 2011

Christmas in July Project

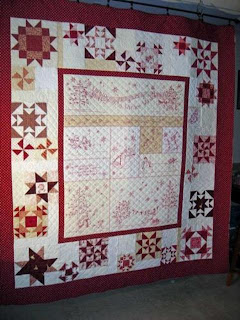
Is it too early to start thinking about Christmas!!  I seem to me moving into a stitching phase, and I've been thinking a lot about doing a redwork project.  I've settled on a pattern called Winter Wonderland.  Country Crafts and Curtains have the patterns on order and I'm starting to prepare a kit box to keep all my supplies in. 


Even though this is an older pattern, I like it because it combines a number of hand stitched blocks as the center, then pieced quilt blocks that surround. I also like this project because I can have blocks at the cottage to work on this summer, and I can have blocks at home to work on.  The tracing of the line images onto the white fabric will be easy with my Frixion pen.

I was Googling images to get some ideas and ran across three different colors of this pattern that have been made up by quilters and pictures posted to online albums. These are really nice, and I notice some nice touches... (ie - the blue crumb catcher on the binding).    They're all gorgeous and I'm really inspired and can't wait to get started. 

It appears I have a decision to make before I move on..... What Color to make?   I wish I had 2 other buddies to make this along with me.  Wouldn't it be fun to see these made up in the 3 colors.  I'll decide in a week or so but I'm leaning toward the blue.  I start stitching on July 1st.    Want to join in on the fun?


Tuesday, May 24, 2011

A Free Folding Totebag Tutorial

I loved making this little folding totebag from a tutorial by Zaaberry today.  

Last week, I had some stash fabric out for other projects, so I ripped off a 10 inch strip, a 6 inch strip and a 4 inch strip and set it aside for when I had a few minutes to make this project.  

This morning, I knew I only had about half an hour before the rain would stop and I would be rushing out the door to get my daily walk in.

I ironed my 3 width of fabric (wof) strips and made the cuts according to the pattern directions.   I sewed up sample/prototype tote in about 20 minutes.  I didn't even print off the pattern... just jotted down the size of the fabric pieces then just referred to my computer for a couple of handle and button placement measurements.   I wasn't rushing, but when I was finished, I was amazed that it sewed up so quickly.
  • I like the size of the bag.  It finished at about 13.5" * 13.5".
  • I like that it folds neatly and is very compact.  
  • I like that it uses french seams for a clean finish inside.  
  • I like that it's a single layer of fabric.   

There was a few inches of the handle left over after I stitched down each side of the double folded four inch strip. 

Before I sewed the button on my machine, I cut two inches of this leftover strip and stitched it onto the tote where the button would be sewn on.  Then I sewed the button on.   I feel that this gives added stability for the button.

Go ahead, and try one....time it... I'm sure you'll be impressed at the functionality of this tutorial and how quick this sews up.

Monday, May 23, 2011

Blooming Onion Bread

We had company at the cottage for the long weekend.  My favorite sister and her hubby, and my niece and her hubby came to celebrate the Queen's Birthday with us.     Every year, we try to will the early arrival of summer, but it turns out to be a clean-up weekend... You know what they say, many hands make light work.   While Saturday was a cold, windy day at the cottage, Sunday was a beautiful sunny day.  A perfect day to tackle the flood cleanup.  With six of us working at the long line of debris left by the flood, it only took an hour to get it raked and moved into the woods.     The gardens got checked over, and perked up... a few transplantings, and a plan to do more work next week.  You can see lots of pictures here on Michelle's blog.

The water is still very high, but the lake was calm enough to get the kayaks out last evening.  To us it looks funny putting the kayaks in by the cement blocks because the normal water level is a good 15 steps out.  It's hard to imagine that there is so much excess water in the river system.

While it's not exactly BBQ season yet, that didn't stop us from having some great food.  For our two suppers together, Michelle and Scott brought a fabulous lasagna with all the fixins....and my sister made a huge pan of cabbage rolls and made fresh rhubarb cake... I'm going to see if she will share her recipe with us.

Something I saw on Michelle's Pintrest was a yummy looking recipe for a blooming onion bread.   I bought all the ingredients to the cottage and Michelle prepared it last evening as our appetizer.   I have to tell you, that this was so easy to make, and it was so delicious.  Here are some pictures that Michelle took as she made it.  

Score the sourdough bread and add slices of Montery Jack cheese
 
Add a couple of chopped green onions, and drizzle warm butter and poppy seeds

Bake in the oven for 15 minutes, and then enjoy warm.


Friday, May 20, 2011

Curtains and more Curtains

We opened our cottage yesterday. With all the damp dark weather, it's not something we were looking forward to. 

But with yesterday's sun and warm air, the opening was a breeze.  No pipes broke.  The water started up without problems.  So once we realized that there were no big problems to fix, the cleaning, hanging curtains and making beds was a breeze.

My daughter bought fabric today and I'll be making her some new living room curtains next week.  So since I was at Fabricville with her to pick out the fabric, I took the opportunity to scour the discount bin, and got this beautiful Asian inspired fabric, with matching lining to make 2 small lined bedroom curtains for the cottage.  

I'll make those later this afternoon and evening, and it'll help pass the time as I wait for my sister and hubby to arrive for the long weekend.   I'm quite excited to see them.

Thursday, May 19, 2011

Leymoyne Star of the frame

Doris, Alice, Judy and Sue
After almost 9 months, all five of us regulars at the St. Anthony's Quilting group were there to place the final stitches in the quilt.  Yes, our knees and knuckles were bumping into one another. 

As we were taking those stitches, the sun was peeking through the round window above the door.  It's been a while since we saw sun.  That was exciting too.


Last line of stitching by Gail before it came off the frame
I gave the girls the little posy wallets to hold their sewing do-dads, and they were so surprised and they loved them.  They'll come back next fall, with all the stuff, stuffed in these little wallets.  It'll be fun to see who put what in their wallet. 

Un-rolling and un-pinning from the frame

I will finish the binding over the next couple of weeks, and then the quilt gets turned over to the church to use for fund raising.  I hope they do well with it.


Tuesday, May 17, 2011

Cutting a Kit- Apple Cinnamon Rag Quilt

Well, the weather is still not what we have been waiting for, so with all my little rainy day projects done, I've decided to cut a kit to make in the fall.  This is a sweet rag quilt from a pattern in this Leisure Arts book, Cut Sew, Quilt As You Go book and I've seen the quilt twice before. 

I can't quite remember the first place I saw it, (Fabricville in Saint John, NB I think), but the second time I saw it last fall at the Cotton Mill Guild's show and tell.  It was made by Estella M. 

Well, ever since I saw it last fall, it's been in the back of my mind and I decided I would make it.  I'm using all fabrics from my stash and I love it because it uses a "quilt as you go" method, so when it's done, it's done!


So here is my kit.  The only empty pizza (project) box I had is the one that I will put Grace's quilt in, but since that's a while away, I'll use it for the Apple Cinnamon Quilt in the meantime.  All I have to do is cut out the batting piecess that go in the quilt.

Tomorrow, I start cutting another kit.  Stay tuned.

Monday, May 16, 2011

Canada Take Along Bags

I've had these little Canada themed take-along bags cut out out and put away for a while now.  I was waiting for a rainy day or two to finish them.  Well, guess what...  It's been raining all week.  So the fabric being cut out, these bags were a pretty quick finish.  Last evening I sewed the buttons on as the finishing touch. 

This versatile pattern is by Lazy Girl Designs, and it's pattern number LD-106.  Ask for it at your local quilt shop, it's a older pattern, but a good one.  You might remember that Joan Hawley of LGD featured me and my bags here on her blog... and she featured my sister here on her blog as well.   So between us, this must make about 35 Take Along bags that we've made between us. 

You might be wondering what am I going to do with these bags.  Well, both my sons-in-law travel to the USA for business meetings, and so they will each get one for their shaving stuff.   But the question is, who will get what color?  

Sunday, May 15, 2011

More Posy Wallets

Remember I made a Posy Wallet from the Art to heart Sew Necessary book a few weeks ago.     Last week I made an effort to go through my scrap pile and cut up some scraps into "Pre-cut" sizes like 2.5" strips etc.  From the larger pieces of leftover fabrics, I cut a bunch of 4.5" and 6.5" strips and saved those to make some Posy Wallets.    

With all the rain and overcast weather, I started them earlier in the week.  In between looking for sun and complaining about the rain, I've been stitching away and voila, today, they are done. 

We will be taking the St. Anthony's quilt off the rack this week, and I plan to give each of the hand-quilters in the group a Posy Wallet of their own.  They can fill it over the summer with hand-quilting necessities, and come back in the fall, outfitted in style.

Saturday, May 14, 2011

A hooded swim or bath towel for Aurora

One of the Friday girls, Vivian made her mother a terrycloth bathrobe last week.  She brought me her leftover terrycloth yesterday when we had our Friday coffee break.  I was pleased to get it because on my to-do list was a hooded bath or swim towel for Aurora.  So, with the leftovers, I made it today.    I'm really pleased with it.  Isn't this puppy face so cute?   It's a soft salmon/pink color, with nice purply floppy ears. 

The pattern comes from a hard cover Singer book that my sister has.  I've made many of these in the past but not for a few years.  It's a fun project and Aurora loves the water, so I know she'll get good use from this.   

Thanks for the leftovers Vivian! 


Thursday, May 12, 2011

Yummy Batiks

It's like Christmas for me today.  I suppose you all know how much I love having fabric in my stash.  I dropped in to Country Crafts and Curtains this morning to chat with Diane, and just look at what she had ready for me.    A yummy 20 yard pack of all different batiks.  Wow, I'm in fabric heaven!!   I did a little work for her over the winter and this was her gift to me for helping her out.  I'm so excited to receive this.   Thanks so much Diane!!

Tuesday, May 10, 2011

It's a busy week

I have lots of items on my calendar this week, and there's not a lot of time for sewing.   

One of the highlights this week is attending the Bill Clinton presentation on the state of our Global Economy.   I've been everywhere trying to buy a biography book to bring with me, to have autographed.  No luck.     Now I'm looking for an alternate book for him to autograph for me.  Do you suppose he would sign my Oprah book?  

Monday, May 9, 2011

I won a Quiltmaker's 100 Blocks Volume 3 Magazine

All my hard blog surfing work last week paid off...

Last week's 100 Blocks blog tour introduced me to so many new quilt designers.  I surfed all week and took note of so many blogs that I had never seen before. I left comments, got lots of ideas,  surfed some more...

I'm quite excited that after leaving a comment on Gingham Girls blog, I am the winner of one of the Quiltmaker's 100 Blocks magazines.  I loved how the Gingham girls gave various layouts for their sweet block.  My favorite layout is the table runner with their block on the ends, and a checkerboard in the center... too cute.... Anyway I hope the Gingham girls can sign the magazine for me. 

Karen Neary from Sew Karenly, is a Canadian designer who lives in Nova Scotia.  She also was chosen to have a block in the magazine said she said would sign my magazine too.   (by the way, Karen is having a draw for one of her Maritime Beauty patterns, which you've seen me make a few times. Drop by and leave her a comment for a chance to win.)

Saturday, May 7, 2011

Quilt Day at Fabricville

After our Friday Girls coffee yesterday morning, I made a trip to Fabricville, because today was Quilt day at Fabricville.  They were having 50% off all quilt fabrics, batting, notions and other fun stuff.  

I bought all the fabric I needed to make 2 baby boy quilts and with my purchase, because I'm a local guild member, look what I got for free.   It's a goody bag with the following in it: 
  • A little Fons and Porter Booklet with 4 patterns
  • 2 fat quarters
  • A package of Needles
  • Gutermann white thread
  • Little green cutting mat
  • A Fabricville Key chain
  • all in a Fabricville Eco Bag.   
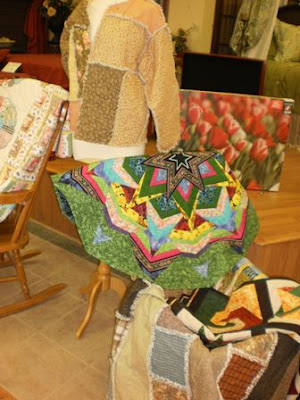
But that's not all.       The staff of Fabricville put on a very nice quilt display.   Have a look below.    Great Job Fabricville.  It was fun to see your special effort for the quilters and I hope you have another inspirational display in July when you have your Christmas in July sale on.   Thanks for the advance notice that I got in my goody bag.


Friday, May 6, 2011

St. Anthony's Quilt - End of April update

Yesterday afternoon, I spent a few hours quilting on the St. Anthony's quilt.  I couldn't go on Wednesday to the regular quilt day, so I thought I'd go in by myself for a few hours to give it a little boost. 

I enjoyed my quiet afternoon.  I was reflecting on all the nice snowy afternoons we enjoyed over the part of the winter that I was with this new quilting group.  The tea and goodies each afternoon were something I looked forward to.    I also reflected on how much I've learned about hand quilting, and how much more confident I am.   I put some thought on what we will do different in the fall when we start up again. 

We're tired of doing the stitch in the ditch.  So the next quilt, will have most of the quilting in the non-seam area.  We call that the butter.  Because it's like quilting through soft butter. That's good and we like that.  I was thinking maybe we're ready for feathered wreaths.   That might be a little scary, so maybe that idea might be reserved and brought up if we do a quilt in the fall of 2012. 

I learned that next time, we'll  use a poly batting.   This one is a cotton batt, and I guess handing quilting through cotton is harder than poly.   We'll try the poly in the fall and let you know if we find a difference.

There's not much stitching left to do now.... The stars are all done.  It's just the sashing down the center  and that needs to be done and ten inches or so along the border on each side.   I predict by next weekend, we will be taking the quilt of the frame, and I'll be doing the final binding and attaching the label.

The unveiling of this LeMoyne Star quilt will be at a coffee party after church in a couple of weeks.  It'll be a fun day.

Jim's iCoat

This is so not a quilty project, but I had fun...

I was trying a little experiment to see if I could sew with leather.  My first problem, I had no leather.    I put out a plea to my Friday Girls for an leather purse or coat that I could use and guess what... Kathy F.'s hubby had a beautiful old well worn jacket that he gave up, just for my experiment.  

I waited a few days, just in case he had regrets, but I got no call.  So I cut up this lovingly worn jacket.  I got a nice pile of leather bits to work with.
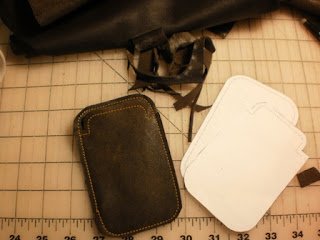
I was searching for patterns to make a blackberry case for my daughter.  I didn't find a blackberry pattern, but I did find this a free pattern for an iPhone case.  It's a great start and I can make minor adjustments to blackberry case.   

What I found out, is that when you sew leather together, you can't use pins.   Also, it's hard to mark on leather.  I tried my new quilters chalk pencil, and my new Frixion pen.  Neither worked.  So I came up with the idea to trace around the template using a piece of chalkboard chalk directly on the leather. 

I was afraid my stitching would be wobbly, so I stitched before doing the final cutting out of the case.  I used jeans thread in the upper and bobbin thread and a leather needle.  Everything worked like a charm. 

What do you think?   Here it is all trimmed.   I sure hope it fits.

Kathy F. is coming for coffee today and this will be a surprise for her.  I think she already has a nice iPhone case.... but will she be able to resist using this cute little case made out of her hubby's favorite jacket?
 

Thursday, May 5, 2011

Seeing Double!

Have you ever bought the same book twice?  

I have been scouring my books looking for baby boy quilt patterns.   I was pulling books out of my personal library to sit down with a cup of coffee and go through the options.  As I was flipping and marking,  I had pulled  this book twice... both had paper bookmarks - in different places, mind you.    

This is a good book, but I certainly don't need two.  So, this extra book will be going into our  Cotton Mill Quilt Guild's silent auction in June when we have our closing pot luck.

Wednesday, May 4, 2011

Ladybug Sugar Cookie Recipe

Last week at the quilt show, I received so many compliments on the ladybug and teapot cookies, I thought I'd share the recipe with you. 

The Sugar Cookie recipe comes from a book that I received for my birthday last year called Cookie Swap.  (Thanks Tracy H.)   This recipe is called the Signature Sugar Cookies and it made about 100 small cookies.  The yield for regular sized cookies 24 cookies that are 2-3/4" in diameter.   I got my ladybug cookie cutter at the local Bulk Barn.  To ice the cookies, I used Martha Stewart's Royal Icing Recipe.  It is the perfect amount and you can be generous with your icing.  Divide the batch to mix different colors.  You will throw a little bit out.

Signature Sugar Cookies

2 cups flour
1-1/2 tsp baking powder
1/4 tsp salt
6 Tbsp unsalted butter
1/3 cup shortening
3/4 cup sugar
1 large egg
1 Tbsp milk
1 tsp vanilla

  • Combine flour, baking powder and salt.  Set aside.
  • With an electric mixer, beat the butter and shortening together until creamy.  Gradually add the sugar and beat until light and fluffy, about 1 minute.  
  • Whisk egg, milk, and vanilla together.  Slowly add to the butter mixture. 
  • Turn mixer to low, and add the flower mixture.  Mix just until incorporated.
  • Flatten the dough to a disk, wrap in plastic, and refrigerate for 3 hours.
  • Roll out and cut with cookie cutters. 
  • Place into greased or parchment sheets
  • Bake at 375 degrees for 8 - 10 minutes.
  • Let cool, then ice with royal icing.
  • Let dry for several hours.

Tuesday, May 3, 2011

Star Light Quilt Kit - for a rainy day or two at the cottage

I have my first cottage quilt kit ready.  It's the Star Light quilt that I saw in person at our quilt show this past week.  It was easy to cut since I had been collecting neutrals and reds for a while now.   Since Mitchell's quilt was done, I'm re-using his pizza box to put this little project in.  It'll be a quick sew...

I also found out that even though I have the McCall's Quilting 2005 issue with the Star Light pattern in it, it was the more recent America Loves Scrap Quilts 2010/2011 magazine that I had remembered being on my cutting table.   I knew my memory wasn't that good. 

In 2005, I liked it too because there was one of my paper bookmarks in the magazine when I found it this past Saturday.  

Sew my question is, where did I lay my "America Loves Scrap Quilts Magazine 2010/11". 

Monday, May 2, 2011

Fussing with my Featherweight

Well, I got out the Featherweight yesterday, and started some serious work on it.  It hasn't been used for 10 or 20 years.   It smells.  It needs lubrication.  It needs oil.  The case needs to be deodorized.  Many many steps. 

This is the little green manual that came with the Featherweight, is quite informative.   On these couple of pages, it shows no less than 30 places where one drop of oil needs to be placed regularly.


This is a new felt piece that goes on the inside of the bottom plate of the Featherweight.  This is where 99% of the offending smell was coming from. The old one was very damp with black oil residue from all the oiling.  It was so disgusting, that it had to right in the garbage outside.  I couldn't use it to trace around to make a new one.   I used the bottom cover to get a general shape, then I whittled down so it fits really good.    I'm going to trace a paper template just in case it'll be useful to somebody else.  Now I'm just waiting to see what kind of glue I can get locally to glue it down with.    With all the oiling the machine needs, I expect this will have to be changed every 5 years or so.

While it doesn't look any different, I know now that it will be much more fun to start with knowing it's had oil.  It will sit on my hubby's workbench while I do a few more things to it, and it should be up and running in another day or two.